Showing posts with label diy projects. Show all posts

Oak Celtic Mash Paddle

Sunday, January 18, 2015

             Awhile back I did a post on a mash paddle I had carved out of a piece poplar, it was a completely aesthetic piece. The soft poplar wood is great for carving, but for a usable mash paddle it is to absorbent and fragile.  I loved the design of the poplar paddle so much I decided to remake it using a piece of oak. I'm not going to go in to a big explanation of the steps I took to create this paddle. I did however use a wood burner this time around for the decorative features. I hope whoever is looking at this page, likes what the see and if so please re-post any pictures on Pintrest or Facebook. Thanks!


Again Thanks for checking out the blog, and as always "never stop creating"

Silk Screen Board

Friday, January 2, 2015

Last semester I took a silk screen class, that I really enjoyed. While looking in to the supplies needed to make a screen board, I realized I could make due with supplies I had laying around my work bench. There is really nothing special about this project, and the only reason i'm even writing about it, is because buying the clamps online can be pricey. Technically this project was zero cost for me, but if you were gonna buy supplies you would need a piece of plywood,  2 cheap C clamps, a scrap 1x2, 2 cheap door hinges, and some screws. Now this is not a tutorial on the process of silk screening, its just an idea for the screen board, and the image I used in the photos was not my original design.

Sorry for the blurry pictures, I took these with my phone. Anyway all this is, is a way to lift the silk screen so you can swap out paper, shirts, or what ever your printing on. If you notice I cut a section out of the back of the plywood. That is so the C clamps have room to clear the board.


I'll I did was attach the 1x2 to the hinges, and then clamp the silk screen frame to the 1x2. Like I said this was a super easy project, but is your in to or getting in to silk screening this is a quick project that works just as good as the 15-20 dollar clamps. 


I'll post a few pictures of my prints, to give you an idea of the kind of things you can do. When I took this class it was my first introduction in this medium, so if your a silk screener don't be to critical. Silk screen is a crazy cool process, and if you ever get the chance I highly recommend taking a silk screen class.  


These pictures are gonna be a little out of order, I guess I didn't take pictures of all the steps.... whoops


SO AS I ALREADY STATED THIS WAS NOT MY ORIGINAL DESIGN. But never the less they turned out super cool. 

Well I hope this helped a few people that need an idea fulfilled. As always thank you for looking at the page and please share the photos on Facebook or Pintrest, it helps me out with getting foot traffic on the page,

Thanks!

Lets talk tools!

Monday, April 14, 2014


Hey guys. I thought I would have a little talk about tools. I use to work in the Tools & Hardware department at Lowes. Everyday I had people asking me how tools worked and what they should buy, so lets break it down. What I want to cover is the basic hand tools and power tools, that every DIY person should be comfortable with and know their uses. There is a tool for every job, and we could be here for days talking about the purpose of all the tools on the market. I am not covering the tools of a cabinet maker or fine carpenter, these that I am discussing are for the Pintrest and DIY toolbox.

Before we get going, SAFETY FIRST, when using tools wear safety glasses or goggles, if sanding use a dust mask,  its always good to wear gloves and remove rings and jewelry. Also when using rotary equipment make sure you are not wearing loose clothing.... this stuff can be dangerous and will hurt you! 

Lets start with the basics. Most everyone owns a Hammer, pliers and screwdrivers. If you do not, then you should because these are your bread & butter as far as hand tools go. You will use these tools more than any other in your toolbox.
  • Standard Claw Hammer
  • Multiple function screwdriver


  •  Needle nose, slip joint pliers, and vice grips.

The next thing your going to want is measuring and leveling tools. A Tape measure, speed square, carpenter square is a must, it will give your building projects a fast 90 degree check for tables, shelves, frames, etc.... You will also want a level, their are different sizes so buy what need. There is no reason to own a 5 foot level when you only need a 1 foot level.
  • Tape Measure
  •  Speed Square

  • Carpenter square
  • Level

Another great tool to have is a staple gun... fabric to Christmas lights, you'll need and use it.

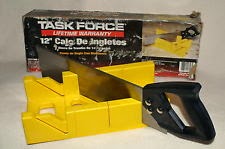
The last of the Hand tools I'm going to mention are cutting tools. A hand saw, miter box, and coping saw. These saws will do just about everything their powered brothers can with a little sweat on the operators part.

  • Basic hand saw


  • Miter box, good for clean cuts and 45degree angles.
  • A coping saw, this is one of my favorite saws. It is great for cutting patterns or quick cuts, their is also metal hacksaw blades that come with the saw.

OK, lets get into power tools. These are the basic and less complicated of the bunch. First off, let me tell you my philosophy on power tools. Power tools are expensive, and if your on a budget harbor freight is going to be your best friend. If their is a tool you use daily or even weekly, spend the money on a good name brand one. If its a tool your going to use every six months, then go to Harbor Freight, you'll thank me later for spending $40 on a biscuit jointer instead of $150 from Lowes.

With all power tools, make sure they have come to a complete  stop before setting them down or walking away from the tool. And wear your safety glasses!
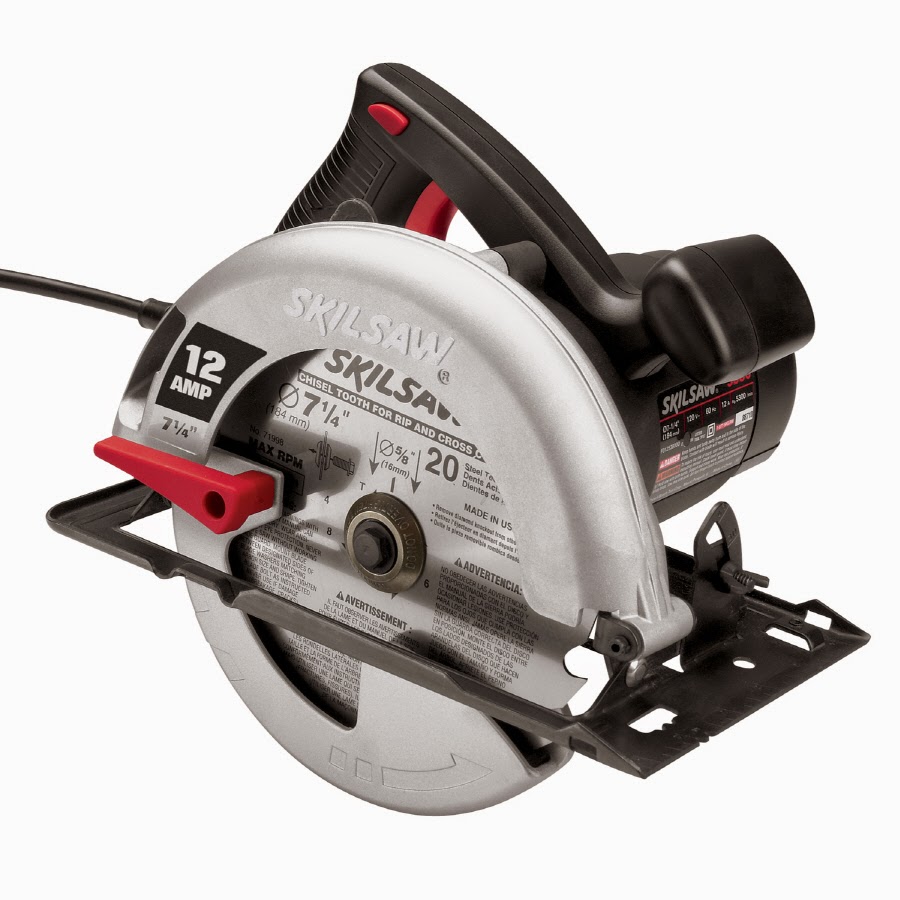
  • Skilsaw, This saw requires a firm grip. This is a straight line cutting saw, if you try to make a curve cut, the blade will bind and bend, which is not good.


  • Jigsaw, like the coping saw this is great for cutting patterns, straight lines can be challenging with out a straight edge.

You may also want these two accessories to accompany these two saws
  •  A clamp down straight edge.
  • A chalk line, just give the sting a snap to get your line.

 The reciprocating saw with a wood and nail blade is great tool for cutting apart pallets. 
  • reciprocating saw, there are many different blades and lengths. 
This small tool has many different size bits and uses, and comes in a range of models from corded to cordless. The Dremel Tool is a fantastic tool for small projects, it is really the Swiss Army knife of rotary tools, and is used from everyone ranging from beginner to expert craftsman. If you are unfamiliar with this tool I suggest looking on their website or your local hardware store and picking one up. It is really an invaluable tool.  

  • The Dermel Tool


The drill, now there are two options and this really goes for most power tools today. Corded and cordless, the benefit of corded is there is no batteries to charge but there is an extension cord that will probably need to be used. Second is cordless, here you have batteries to charge but much more flexibility of movement. This is probably a power tool your going to want to spent the extra money on, and purchase a quality drill, because you will use it ALL the time. If you buy a cordless, I would get a 18volt or 20volt lithium, there a little bit more expensive but they holds the charge a lot longer.
  • Cordless drill
Here are a few sets that you might want to have for your drill
  • A basic driver set, a lot of screws are getting away from the phillips + and straight  - drivers, most are moving to the star and box type drivers because they strip out less, so if you buy a set make sure it has all 4 types.

  • A varied size drill bit set. This is something that price can depend on, the better quality the drill bit the more they cost and sharper they stay, but the smaller bits can break easily so it is not uncommon to have bits missing from your set after a few projects. Its your call.

  
  • This is a hole saw kit, its something I added because it can be handy.

Power sanders, this is a great tool. There is a few types, a round, square, and a corner base vibrating sanders. I am only showing the square base sander because its the easiest one to cut sandpaper to fit.
  •  Square base vibrating sander.

Another type of sanding tool is a angle grinder, this tool requires some skill but can be very effective. This tool has a few different wheels than can be changed out for cutting, metal grinding and wood sanding.
  • Angle grinder

  • Wood and metal wheels.


Clamps, if you are gluing, sawing, grinding, or sanding you will need to clamp it together or clamp it down. You may need many of these and I highly recommend harbor freight. There cheap and do the exact same job as the expensive ones.

 The last two Power tools I'm going to talk about are not a necessity, but if you have the space and the finances then they are a great addition. They are a Power chop saw, and a table saw. The chop saw is just a power miter box, and will cut your projects in half... literally. The table saw is great for ripping down boards. Both are pricy but once you have them, you will wonder how you lived with our them.
  • Chop saw
  • Portable table saw.

I hope this helps some of you out there, that want to do more creative projects, but don't really know much about tools. Check out Harbor Freight for some cheap tools, and remember all that makes a person an expert is practice. www.harborfreight.com  and all photos were pulled off Google.

Thanks!


Hover to Pin

 
Designed with ♥ by Nudge Media Design