
Hey guys, this is my first blog post so I hope its helpful. My wife just made the local roller derby team and she needed some way to practice and strengthen her balance. I've seen balance boards online that can cost as much as $150. My philosophy is 'if it's possible, make it YOURSELF!' I took pictures as I went along, I however forgot to incorporate how I dyed the PVC pipe, I'll try and get a post about that later. So here we go.

The first thing I recommend is always start on paper before you move to wood, the paper is much more forgiving. This is a pretty basic design that can be found with a quick Google search.
 After you get your pattern drawn out, the next thing is trace it to your piece of wood. There are a lot of choices that can be used. The piece I used was a 1/2" plywood, but you can use everything from plywood to solid wood boards. I will also recommend using a thicker board 3/4" if your a little heaver than say 150lbs. I can feel it bow a little when I use it.

Cut out the end pieces using the extra scrap


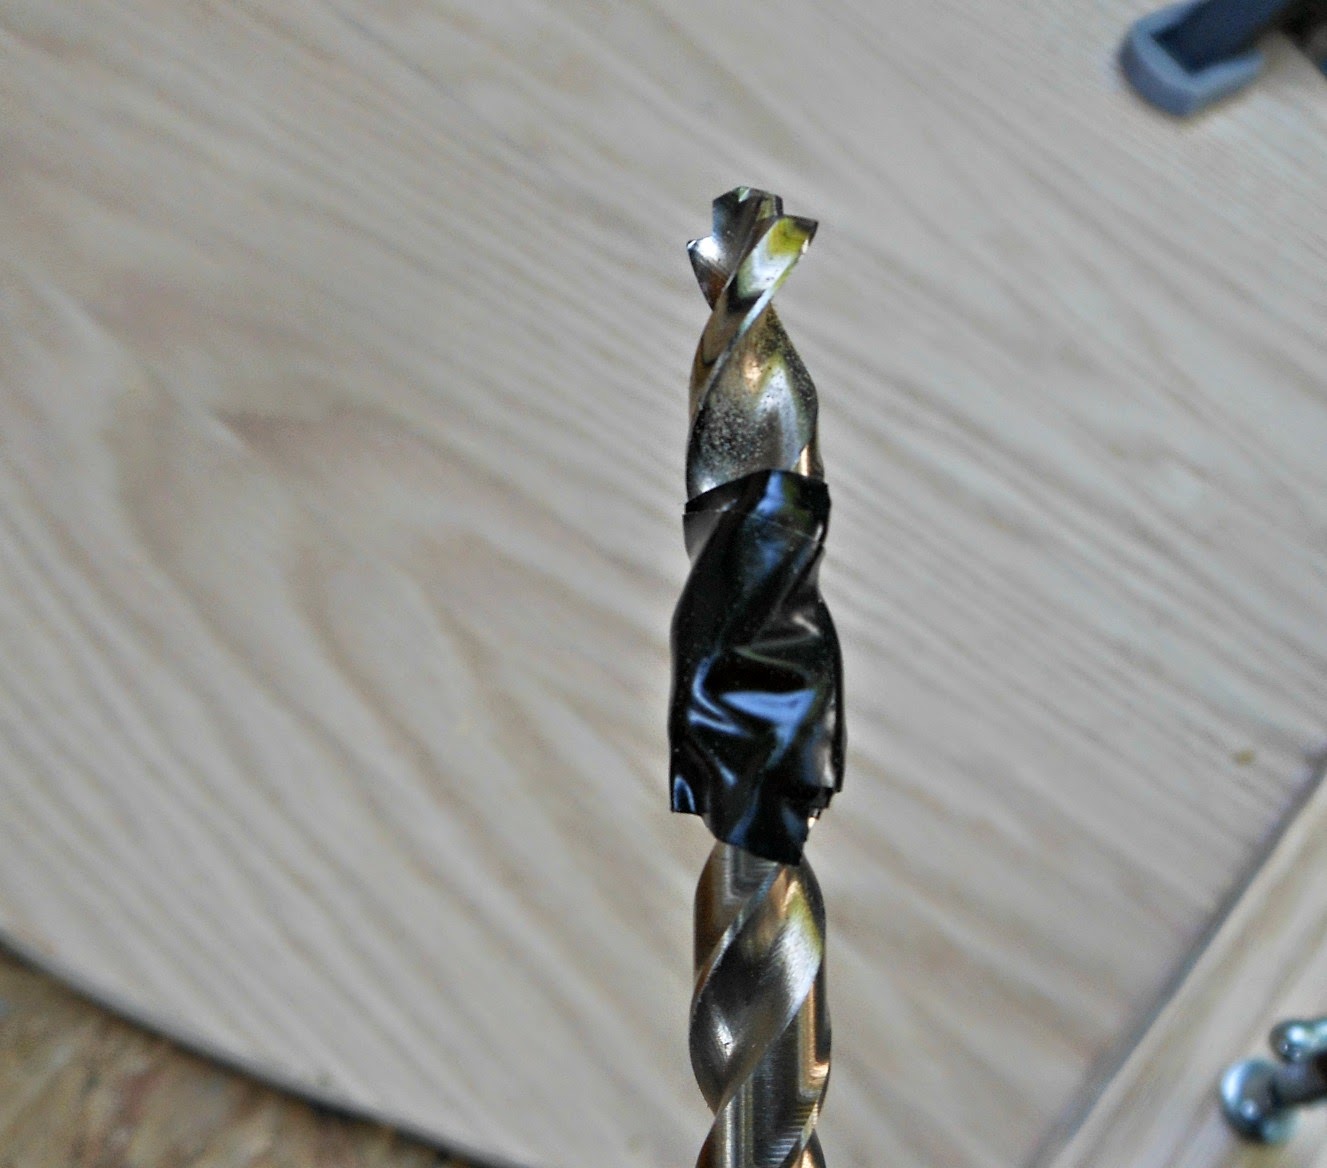
USE CLAMPS, there worth the couple of bucks they cost from Harbor Freight, and you will get a better bond. I use electricians tape to tape off the drill bits, that way there is no risk of drilling all the way through your piece.

I use dowel rods in a lot in projects in the place of hardware, I like the end result and it shows craftsmanship. Plus screws are getting expensive... lol. If you choose to use screws just swap them in place of the dowel pins.

These are just cut dowel, the length doesn't matter as long as there not to short. They will be cut of and sanded later.

Once the holes have been drilled, fill them with wood glue and insert the pins.


Cut the pins off flush, and begin sanding. Start with a lower grit and move to a higher grit. 80 grit to 220 grit should get the job done.

I taped off a roller derby kinda theme.

Instead of painting this project, which is always an option. I used wood stain. If you are going to tape of a design in something you want to look nice don't be cheap with the tape. If you buy dollar store painters tape, you will get dollar store results. Go ahead and get a roll of Edge Lock or Frogtape, its worth it.

After your satisfied with the stain, add a few layers of polyurethane to protect the surfaces.

That's it! I hope you enjoyed this tutorial.

The first thing I recommend is always start on paper before you move to wood, the paper is much more forgiving. This is a pretty basic design that can be found with a quick Google search.
Cut out the end pieces using the extra scrap
USE CLAMPS, there worth the couple of bucks they cost from Harbor Freight, and you will get a better bond. I use electricians tape to tape off the drill bits, that way there is no risk of drilling all the way through your piece.
I use dowel rods in a lot in projects in the place of hardware, I like the end result and it shows craftsmanship. Plus screws are getting expensive... lol. If you choose to use screws just swap them in place of the dowel pins.
These are just cut dowel, the length doesn't matter as long as there not to short. They will be cut of and sanded later.
Once the holes have been drilled, fill them with wood glue and insert the pins.
Cut the pins off flush, and begin sanding. Start with a lower grit and move to a higher grit. 80 grit to 220 grit should get the job done.
I taped off a roller derby kinda theme.
Instead of painting this project, which is always an option. I used wood stain. If you are going to tape of a design in something you want to look nice don't be cheap with the tape. If you buy dollar store painters tape, you will get dollar store results. Go ahead and get a roll of Edge Lock or Frogtape, its worth it.
After your satisfied with the stain, add a few layers of polyurethane to protect the surfaces.
That's it! I hope you enjoyed this tutorial.


Looks awesome!.. I look forward to more project tutorials. Inspiring me to start a blog.
ReplyDeleteThanks Brian, I always thought blogs were kinda silly but I find writing the tutorials kinda fun. You should totally start one, people like us have to much knowledge in random subjects, not to share it with others.
Delete